Getting started
Installing Nabla, what happens the first time you start it, and where to go next.
Installing
Nabla ships as a self-contained application directory for Windows: unpack it anywhere you can
write to and run Nabla.exe. There is no separate runtime to install — the Java
runtime and the C++ solver are bundled inside the application directory, next to the
manual folder holding the page you are reading and the materials folder
holding the built-in material library.
Triangle is not bundled with Nabla. Triangle is the mesh generator Nabla uses,
written by Jonathan Richard Shewchuk, and its licence asks that it be obtained from its own project
rather than shipped inside a commercial one. The Nabla installer therefore has a Download
Triangle step: one click fetches it, free of charge, from the public repository at
github.com/Ar4ibald911/Triangle and places it in the Nabla application directory,
where Nabla finds it automatically from then on. You can equally download it yourself from that
repository's Releases page. An internet connection is needed for that
one-time download and for nothing else in Nabla.
If you skipped that step, already have Triangle, or are installing on a machine with no
internet, Nabla will look for triangle.exe in four places, in this order:
- the path in the
NABLA_TRIANGLEenvironment variable, if you set one (it may name the file or the folder holding it); - the Nabla application directory — next to
Nabla.exe, which is where the installer's download step puts it; - anywhere on your
PATH; - a Nabla source checkout, for developers.
Any one of them is enough, and none of them depends on which folder you start Nabla from. If
none has it, the first attempt to mesh explains this and lists every location it searched, so you
can see where to put the file. Copying triangle.exe from another machine into the
Nabla application directory is a perfectly good offline install.
Your first run
On the first start Nabla shows the Welcome & Capabilities dialog. It has a short line about what changed since your last version and one section per area of the application — Model, Solve, Analyse, and (only if your licence includes them) Machine design and Thermal analysis. From there you can:
- Interface tour — a short guided walk around the main window: the canvas, the Model Tree, the workflow tabs, the traffic light and the log bar;
- Build an example model — a guided, step-by-step build of a real model, meshed and solved with you at the controls;
- More tours & examples... — the same two tours for the Machines and Thermal modules, when your licence includes them;
- Explore on my own — dismiss the dialog and start drawing.
Untick Show this on startup if you do not want to see the dialog again; every tour and example stays reachable afterwards from the Help menu (Interface Tour, Guided Example Model), and a tour you leave part-way is offered back to you next time you open that menu.
The core example: a C-core electromagnet
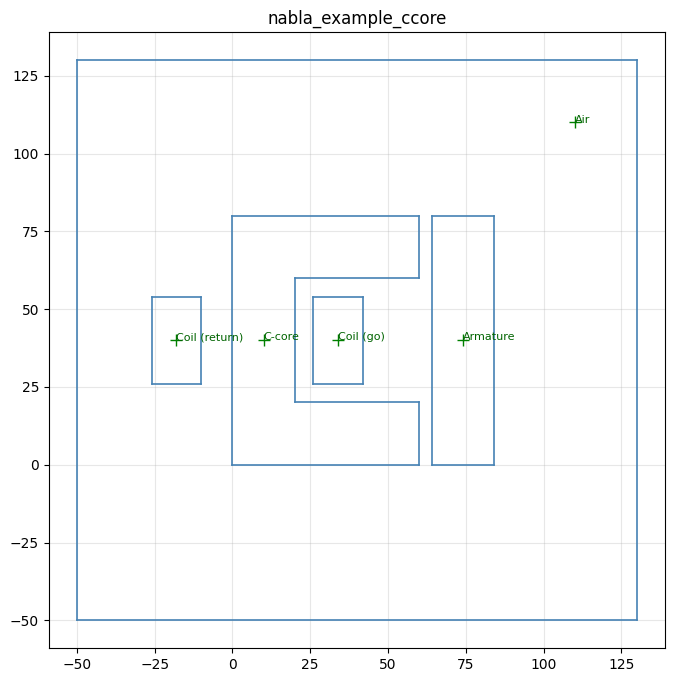
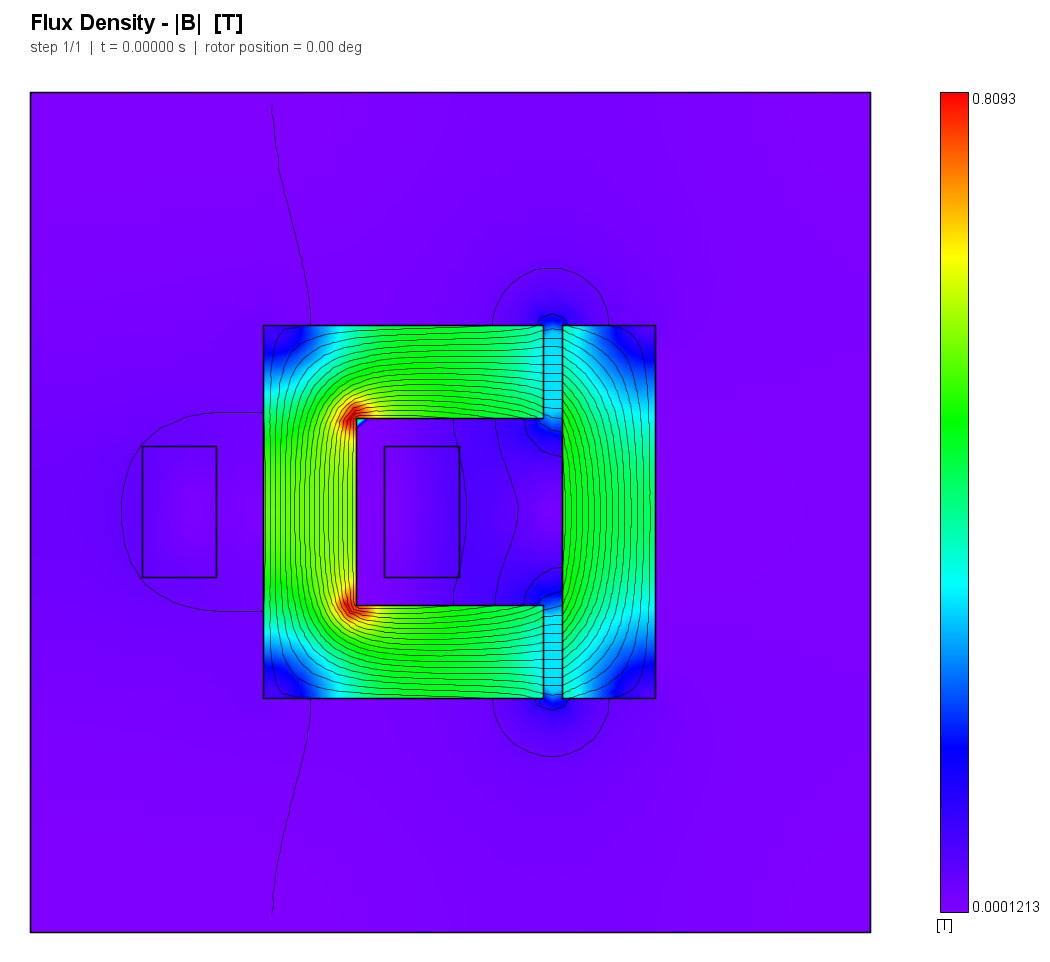
The default Guided Example Model builds a C-core electromagnet: draw the C-shaped iron core and its armature, mesh, solve a magnetostatic problem, then read the force pulling the armature closed. It is the fastest way to see the whole workflow — geometry, regions, materials, boundary conditions, coil, mesh, solve, result — end to end on a model simple enough to finish in a few minutes. If you only read one part of this manual hands-on, make it this example.
Machines and thermal examples
Machines ThermalIf your licence includes the Machines module, Guided Example: PMSM generates a permanent-magnet synchronous machine from parameters instead of by hand, solves it, and reads torque and flux linkage. If it includes the Thermal module, Guided Example: Heated Conductor runs a steady-state heat-conduction solve on a current-carrying bar in an enclosure. Both have their own short interface tour first, covering only what is different in that mode.
The bundled example library
MachinesHelp → Examples... opens the library of worked machine models that ships with Nabla — nine of them, from a 12-slot/10-pole surface-magnet PMSM through IPM and outrunner rotors to induction machines with skewed and drawn double-cage rotors. Each entry says what the machine is, what it demonstrates, where its dimensions came from, and which modules a licence needs to include for the whole of it to run.
Open a copy puts the example in
Documents\Nabla Examples\ and opens the model from there. It copies rather than
opening the installed file in place because meshing and solving write beside the model, and the
installed library lives under Program Files, which you cannot write to. An
example you have already copied is never overwritten, so results you have built up in that folder
survive a second copy.
What ships is the source of each example: the model, the Python build script, the
README, and the DXF and loss-data files the script reads. The mesh, the solution and the figures
are not shipped — they are what running it produces. Show folder opens the
installed library in your file manager, and Copy script path gives you the path
to hand to nabla-python if you want to rebuild an example from scratch or change a
dimension and see what moves. Running a script needs the Automation module; opening a model never
does.
An example that needs a module your licence does not include is still listed, and still opens — only starting a new solve is refused. The picker says which module is missing before you spend a mesh finding out.
What you get without a licence
Nabla starts and stays usable with no licence at all: draw, mesh, solve and read results within
the free tier's limits (a capped mesh size and watermarked reports). Buying a licence raises or
removes those limits and unlocks second-order elements, the machine, thermal and automation
modules, and the other capabilities marked
Core Pro,
Machines and
Thermal throughout this manual. An expired licence never
blocks you from opening a model or reading a result you already have — only starting a new
solve is refused, and even then Nabla falls back to the free tier rather than stopping. Open
Help → Licence... at any time to see what this copy is entitled to,
and see Troubleshooting below for what a LICENSE_ERROR: refusal
means.
Next steps
- Interface — the window layout in full, once the tour is a memory.
- Geometry — start drawing your own model.
- Troubleshooting — when something does not work.
- Back to the contents.